How to Paint a Checkered Floor Pattern
Painting a 200-year-old subfloor
DIY HOME RENOVATIONS
Rebecca Kelly
6/15/20264 min read
Ever since I can remember, I’ve loved checkered floors. Whether they’re marble, stone, wood, or another material, they’re such a stunning and timeless design choice. When we decided which rooms in our new house would be our offices, we agreed to use the spaces however we wanted. We had lived so long in tiny spaces, never really able to branch out and feel like we had a space that felt like us rather than a shared space. It is a total luxury and privilege, so I had to live it up (just on a tight budget).
Why I chose paint
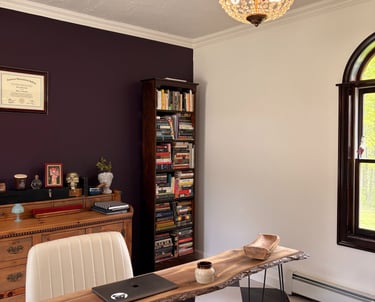
If you’ve read my blog before, you’d know that my house is 233 years old. My office is actually an addition built onto the house in the 1800s. The former owner had removed whatever flooring was there and brought the room down to the subfloor. So when we bought the house, it already had a painted wooden floor, as you can see here. I had seen someone paint a hardwood floor in this pattern before, and I absolutely loved how an aged wooden floor looked with a large-format checkered pattern. Even though I loved the idea of feeling a cool, smooth marble floor under my feet, I decided to try painting to see if I liked it. The risk was small; it was already painted. If I hated it, I'd just cover it up in a few years. So part of my decision was ease, and part of it was budget. Fortunately, I am absolutely obsessed with the results!


What paint did I use?
I did a lot of research on paint brands for flooring. I ended up going with Royal Enamel paint that was meant for flooring and outdoor decking. I figured this would hold up the best after reading reviews and talking with an associate at my local hardware store. After I picked out my colors, I bought just one gallon of each paint color and got to work. My suggestion is to definitely spend the time cleaning, vacuuming, and scrubbing as best you can before a single drop of paint touches the floor!
Initial Painting
I did not bother with primer as the paint already had it built in. I went on trust with this one, and it ended up paying off because I have had no issues with adhesion, but definitely make sure you understand the surface you’re painting on first. I was able to cut in pretty easily with a brush, then use a roller to get the bulk of the boards well covered, much like on a wall. This process shocked me as I needed 3 coats! Fortunately, the paint goes on pretty well, so I was able to cover the whole floor with just one gallon of the off-white.


How I created a grid
I decided to create a grid instead of using a square template to draw one square at a time. The room is over 200 years old, and the wall corners are not exactly 90 degrees, nor are any of the walls perfectly straight. I didn’t want the last row to be horribly uneven, so I figured this was the best way to achieve this. I tried my best with a yardstick, and after throwing the yardstick several times because my lines were still uneven despite obsessive measuring, my husband took over with a level liner and his patience. It took us a really long time, but we were able to get the most squared off grid possible, and then it was time to start labeling the squares.
My 6-year-old absolutely loves helping us with home renovations, so I had her draw the “B’s” on all of the squares to be painted black. My next dilemma after the grid saga was realizing I had to hand-paint loads of black squares without painter’s tape. Part of the draw I had toward painting the old floor was how worn and full of character the wood was. If I had used painters’ tape to block off all the black squares, the paint would bleed under all the scratches and uneven dips, so I spent the next 2 days cutting in all the corners and edges and used a cabinet roller to speed up the second coat. Two coats worked perfectly for the black squares, and my vision fully came to life once it was complete. I am so happy I took the long route, and my wallet is incredibly happy that I did not use 300 square feet of marble. I could not be happier with how this office turned out overall!
My tips and takeaways:
If you use satin or gloss paint, it will be easier to clean and more scratch-resistant. The floor has held up really well, apart from a couple of scratches I had to patch because of heavy furniture being moved in. I see this as part of the cost of having the room look exactly as I want. I keep a little spare paint in a drawer, but have not had to tap into it yet. My suggestion to anyone, though, is that this design idea works well for low-traffic spaces. Not many people walk through this office, and usually never with shoes and equipment.